VFX - SPITE

.Background
"Spite - Curse of Tzalozel" was a game project assignment during my Procedural Artist education at The Game Assembly. The game was developed in our own custom built engine, programmed by the students themselves. Therefore, all the VFX were made and implemented completely in HLSL code. The project consisted of 13 TGA students from different disciplines and was developed during 7 weeks in the fall of 2025.
.LIGHT & HEAVY MELEE
The meshes for the two melees were modeled in Blender and the textures were made in Substance Designer. For the heavy melee, I used a frame-by-frame reference of the animation to make sure the effect played in perfect line with the weapon’s movement.
Since the light melee would be discreet in both shape, timing and color strength, the texture had to have more blocky, clear shapes. This was so to compensate for the quick life lifetime and small size of the effect - by bumping up the details in the texture no essence of the effect would be lost.

I made a base texture by combining differently warped tiling noises, feeding the output directly into the alpha channel of the final albedo texture to be used later in the shader. A gradient texture was added on top, after having coloured the two layers separately, and I fed this into the RBG-channels of the final albedo texture.

In the shader, I extracted the alpha channel of the texture to be used as the opacity output, and the other channels were extracted together as a vector 3. While sampling both of these values, I distorted the UVs of the mesh to create the panning effect. By using an exposed lifetime parameter directly in the shader, I could also create an eroding look over the effect’s lifetime.
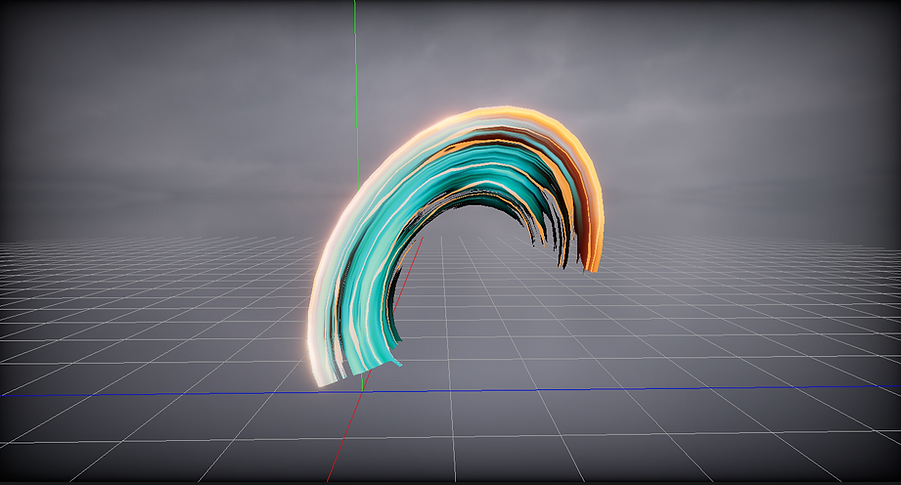
The heavy melee would both be much larger in scale and have a longer lifetime, so the texture could afford more smooth details. To make the effect more "juicy", I ended up using two textures for more layers of details, stacking them in the shader. I also added small particles at the impact location, having each sprite sample a different color from a palette at spawn for more variation during gameplay.
I used similar techniques to make the heavy melee textures as for the light melee, using noises, warps and different blending methods and finally packing the outputs into specific RGBA-outputs of the final textures for different usages later in the shader.


By distorting the mesh’s UVs differently every time I sampled a channel from the textures, I could make each layer behave in a unique way, once again creating the depth needed for a more juicy effect. To animate the opacity - making it look as though the effect was first growing to then have the end catch up on itself - I adjusted the values of a smooth step function. First, I set the min and max values and lerped the alpha value to create the growing part of the animation. To make the second, "catching up", part, I then flipped the min and max values and lerped the alpha once again.
.STUNNED
The stunned effect had two parts and I was responsible for making the one playing for the duration of the stunned state. While modeling the meshes, I extracted a pose from the stunned animation for the different characters and shaped the spirals around that. This was to make sure the meshes wouldn't clip into each other when combined in the game.
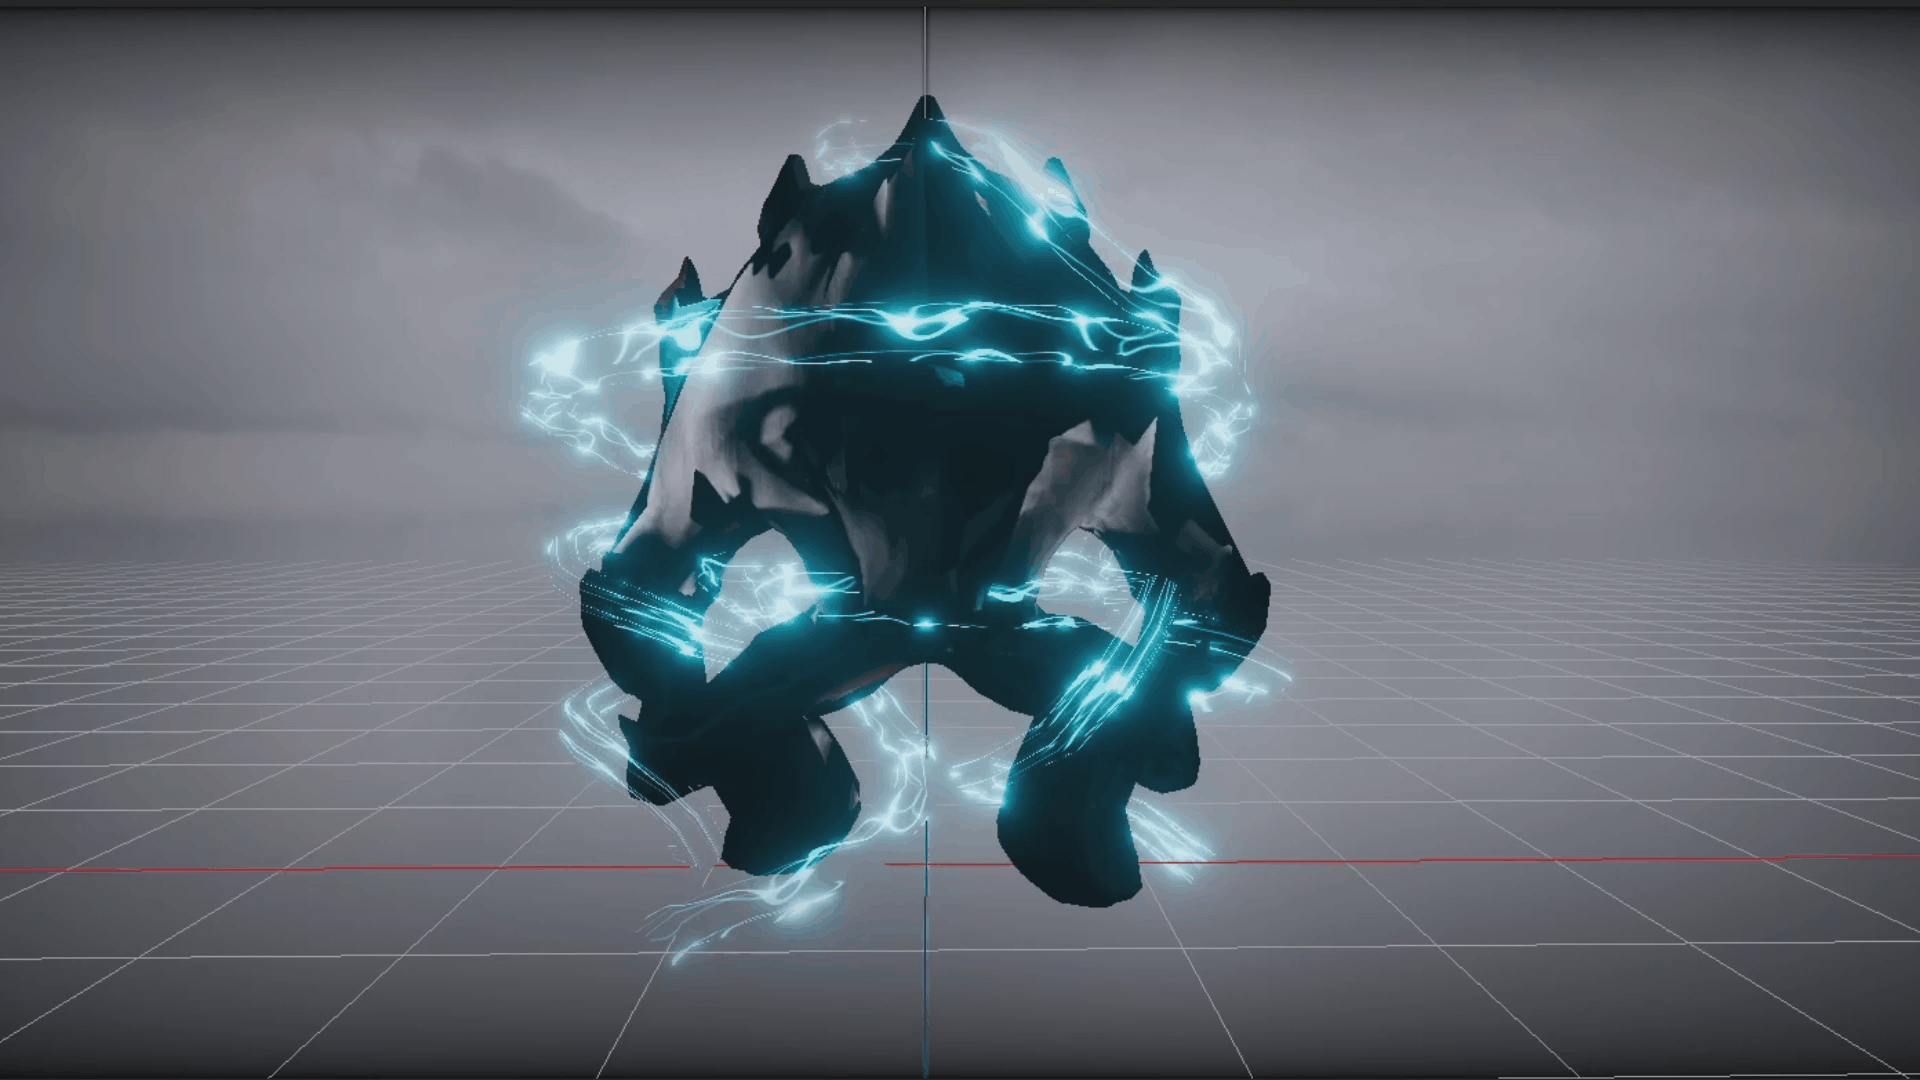
In total, the effect used only one texture, with separated RGB channels for the different layers of lightning. In the shader, I then unpacked the different channels, each with differently distorted UVs. Using the same channels, I combined them to make the opacity output, running it through a smoothstep to animate a smooth transition of the effect.
text text text text text text text text text text text text text text text text text text text text text text text text text text text text text text text text text text text text text text text text text text text text
The colors, emissive strength, and alpha value for the smoothstep were all exposed parameters, so I could edit them directly in the engine. It was also so the programmers could animate the values during runtime when the stunned state was active.
The texture was made by distorting a line shape three different times, each with a different noise texture, and then packing them into separate RGB channels.
This workflow - using different channels for one texture and setting colors in the shader - was not only to optimize performance by demanding fewer texture samples (since I could reuse the same channel information for different things in the shader) but also to optimize workflow since it allowed for more hands-on adjustments directly in the engine.

.PROJECTILE
The projectile effect used the same techniques as the previous effects, using two meshes as the base shape and creating textures in Substance Designer. The projectile was part of the boss attack and had the same color scheme as that character. The texture was made by tweaking different voronoi noises, using levels, warp and blur nodes. I also used the same texture to make a sprite texture for the particles.
In the shader, I once again used the trick of sampling the different channels of the texture using individually distorted UVs to create the layers and detail depth. This technique also allowed me to use the same texture for both the red and the black part, so in the end I only used one single texture for the whole effect.

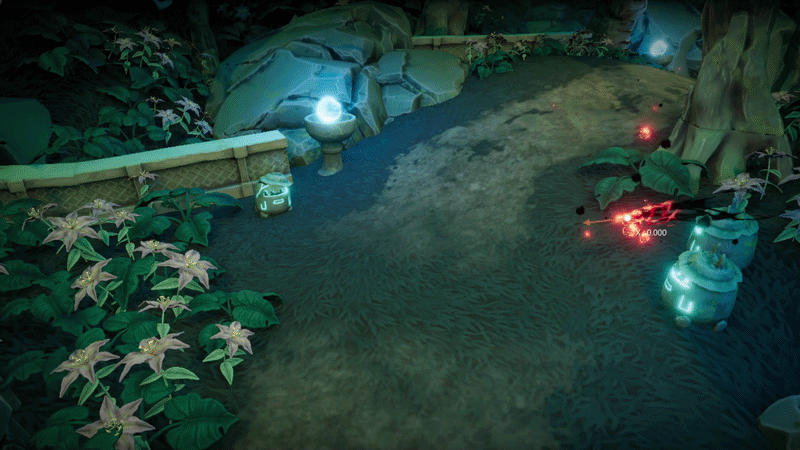
I also spawned particles, using our own student-made particle system. In the shader for the particles, I used an exposed vector 3 parameter to set the material color directly in the engine, where I then made two instances of the sprite material. By doing this, I could set different colors for the particles, while only using one shader. I set the particles to being calculated in world space instead of local to make the stay behind the object when it moves, creating the trail-like effect.